

I know this may seem silly, but I have always wanted to take a cooking class.
Yes, I read a lot of cookbooks. And yes, I watch A LOT of Food Network. But there is a certain energy that comes from a group of people, cooking together in a kitchen, that you just can't get any place else. So when I saw that my local kitchen store, The Cook's Shop , was having an Artisan Bread making class I immediately signed up.
I LOVE bread. I have been known to travel 2 hours to stock up at the most amazing bakery called Omega Artisan Baking located at North Market in Columbus, Ohio. I love the crusty outside and light airy inside. *sigh* Shall we just have a moment for bread? Anyway, I thoroughly enjoyed the class and I learned a lot of old world techniques. Something else I learned, Artisan Bread takes a LONG TIME. In a best case scenario 24 hours. And in the words of this housewife "Ain't nobody got time for that!" So I set out to make beautiful, artisan bread in the same amount of time it would take to make a basic white loaf. It took me a couple goes, but I am pleased to say that I got it and I am going to share it with you!
Let's get started!
Artisan Bread:
*Prep-Time: 2 hr. and 20 min. *Cook Time: 30 minutes *Difficulty: Intermediate *Servings: 1 loaf
Ingredients:

- 3-4 c. of All Purpose Flour
- 1 1/2 c. Warm Water
- 1 1/2 tsp. Dry Active Yeast
- 1 tsp. Sugar
- 2 tsp. Salt
You are going to want to create a warm environment for the bread to rise, so turn the oven to 200 degrees.

Then, to 1 1/2 cups of warm water, add 1 1/2 tsp. of dry active yeast as well as the sugar.
Set a timer for 10 minutes to allow the yest to proof.

While the yeast is proofing, pour the flour and salt into the bowl of your stand mixer.
Don't worry. If you don't have a stand mixer, you can mix this in a bowl and knead it by hand.

After 10 minutes you should see a foamy top on your yeast water.
This means the yeast is alive and ready to do marvelous things!

Attach the dough hook to your mixer and turn the speed level to "2".
Then, gently pour in the yeast water.

Let the mixer continue on the "2" for about 5 minutes.
If you are doing this by hand, mix together in a bowl until a dough forms.

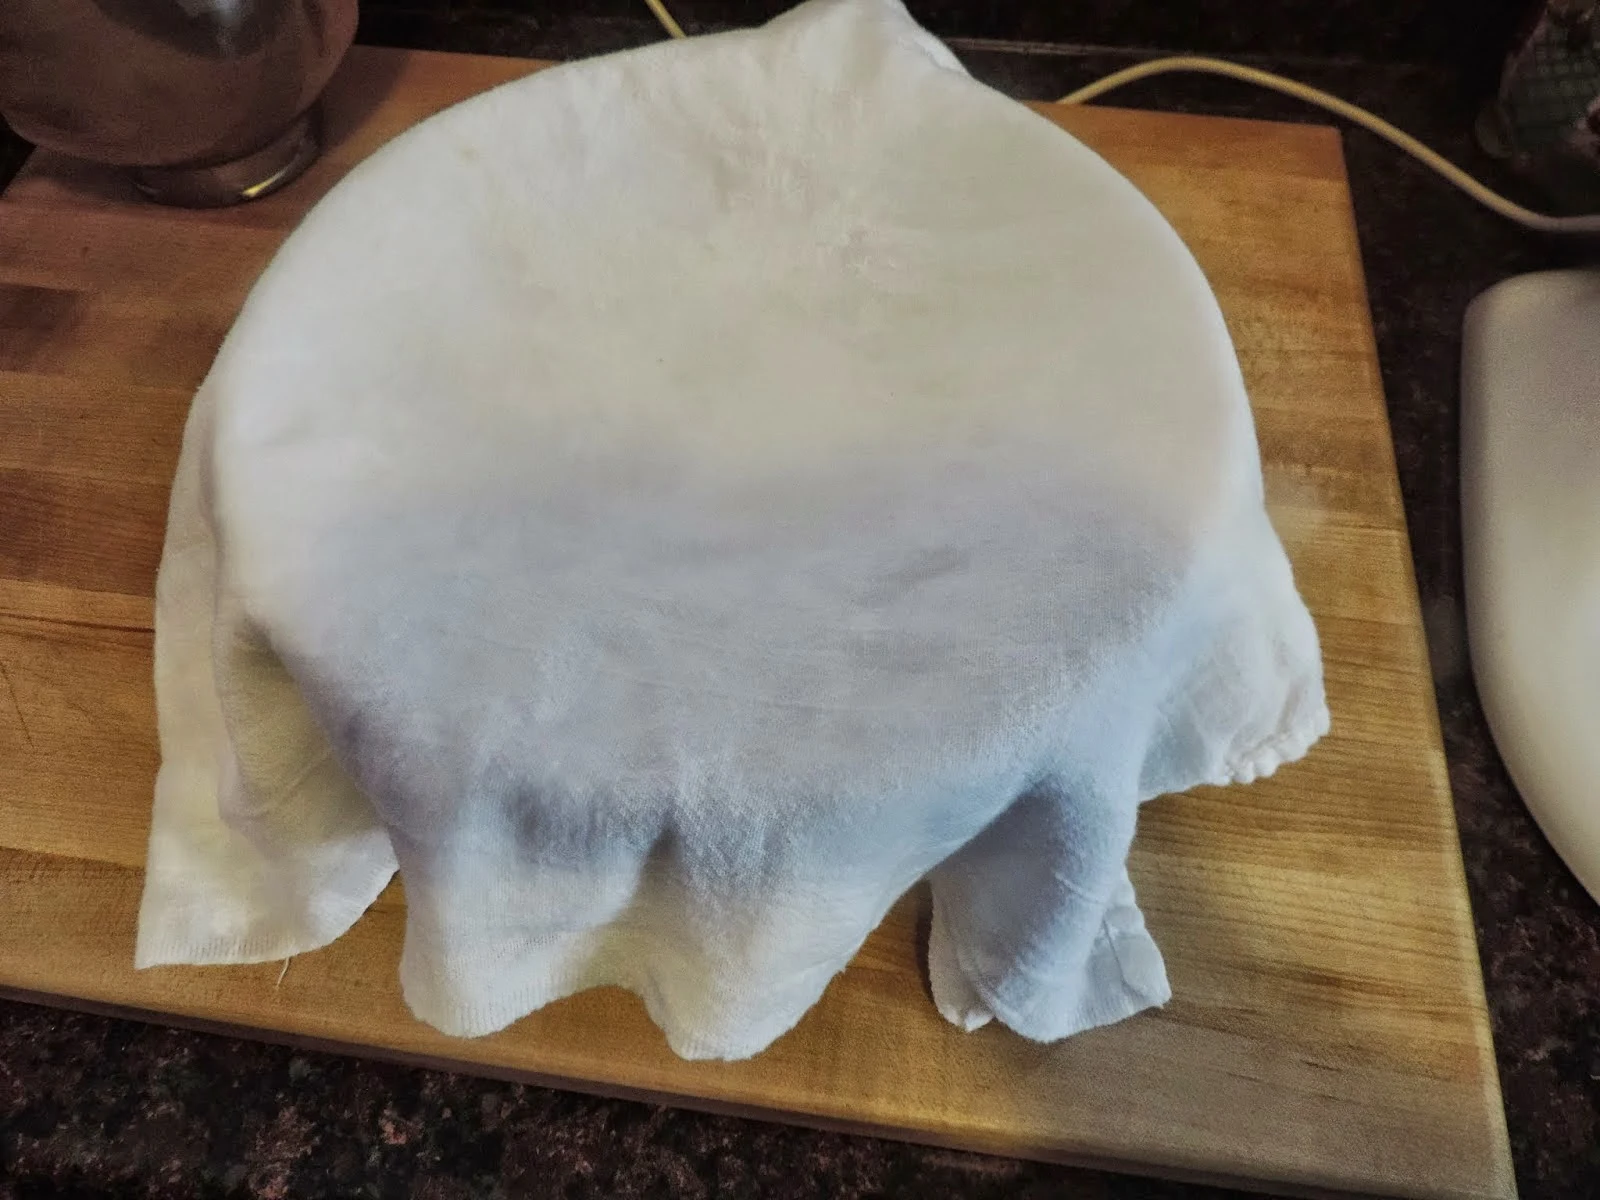
While your dough is kneading get out a bowl and pray it with cooking spray or brush it with oil.

After 1 hour your dough will have doubled in size and is ready for the next step.

While I was at the cooking class I learned about this cute little baking gadget, a wicker bread proofing basket.
Basically it is a fancy bread mold. You don't HAVE to use this.
If you don't have one, a mixing bowl with parchment paper or a clean dish towel with flour in it will work great.
BUT, if you DO have one, give it a dusting of flour.

Next place the dough onto a floured surface and knead it to form a ball.
Then, place the dough in the basket, cover, and set on the stove top to do another hour rise.
This time though, while the dough is rising, you will need to bump the oven temperature up to 500 degrees and place a dutch oven in it to heat as well.

After 1 hour, your dough will look a little something like this.

Now you are going to turn the dough out onto a piece of parchment paper.
Do you see how the proofing basket gave the bread a neat texture? Yeah, that is it's soul purpose. So don't run out and purchase one of these unless you REALLY want to.
I will tell you that if you have used a mixing bowl for your proofing, just give the dough a little dusting of flour. It will make a prettier finished product. :)
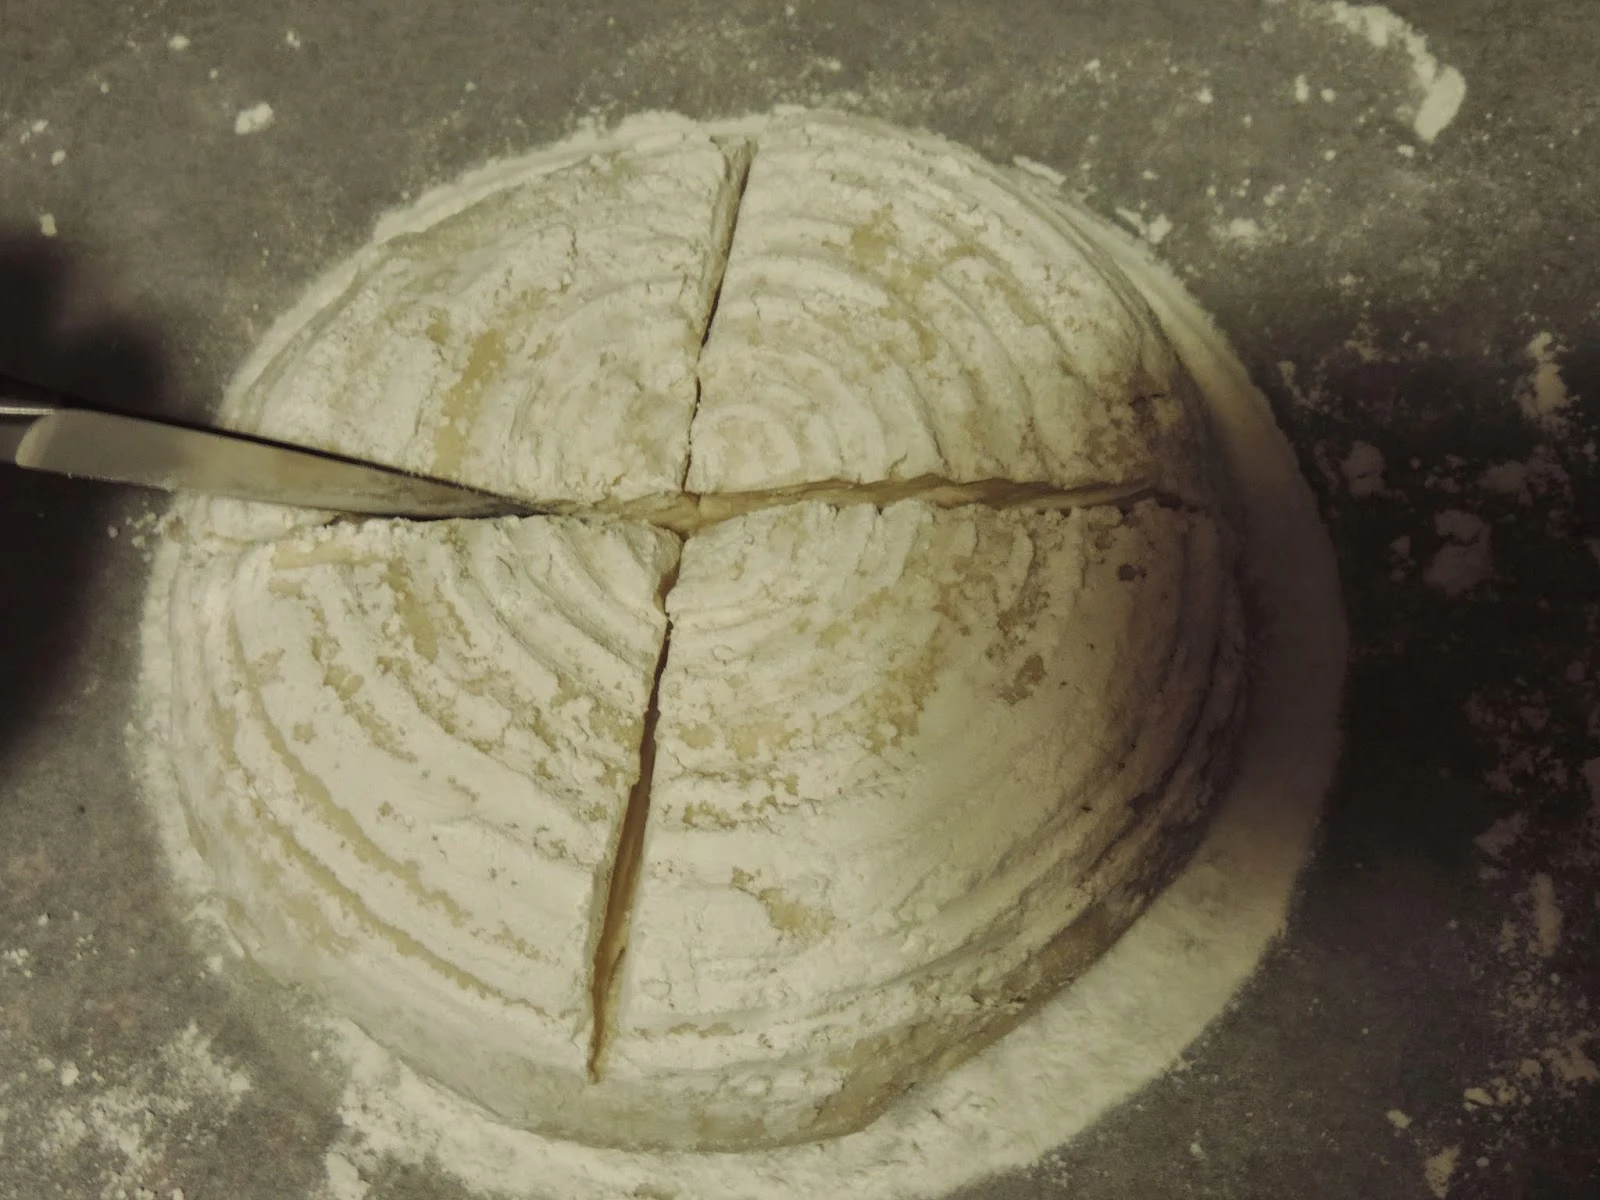
The next thing you will need to do is take a paring knife and make some slits in the top of the dough.
This is to keep the dough from exploding in the oven. That would not be pretty.
You can do any pattern you like. I just chose to do an "X".

Now you will remove the HOT dutch oven from the oven and place the parchment paper with the dough on it, into the pot.

Place the HOT lid back on the dutch oven.

Then place the HOT dutch oven back into the oven.
Bake for 20 minutes.

After 20 minutes, remove the lid from the dutch oven and allow it to cook for another 10 minutes to brown.
Now, you are going to smell something burning. DON'T WORRY! It is just the parchment paper.
It is 500 degrees in there for Pete's sake! *lol* You're bread is fine,

After 30 minutes remove the bread from the oven.
Eeeeeek! Look at it!

Then, CAREFULLY remove the bread from the dutch oven and place on a cooling rack.

And there is it. Look at it! Look at what you did! It is stunning! Let's be honest. If you bring this beauty to the table, your family may possibly give you a standing ovation. I'm serious! It is THAT pretty. And not only is it pretty, but it is perfectly crisp outside and light and chewy inside. You are going to love it! I dip mine in a little balsamic vinegar and extra virgin olive oil, but some good ol' fashioned butter on this is DIVINE! Oh, and this would be PERFECT for you leftover turkey sandwiches this Thanksgiving. OH YEAH!
So don't let the term ARTISAN scare you. Give this incredibly simply recipe a try! You may never buy your artisan bread again!
Happy Reading, Happy Eating, and Happy Living,
~The Kitchen Wife~

Then, to 1 1/2 cups of warm water, add 1 1/2 tsp. of dry active yeast as well as the sugar.
Set a timer for 10 minutes to allow the yest to proof.

While the yeast is proofing, pour the flour and salt into the bowl of your stand mixer.
Don't worry. If you don't have a stand mixer, you can mix this in a bowl and knead it by hand.

After 10 minutes you should see a foamy top on your yeast water.
This means the yeast is alive and ready to do marvelous things!

Attach the dough hook to your mixer and turn the speed level to "2".
Then, gently pour in the yeast water.

Let the mixer continue on the "2" for about 5 minutes.
If you are doing this by hand, mix together in a bowl until a dough forms.

While your dough is kneading get out a bowl and pray it with cooking spray or brush it with oil.

Using a rubber spatula, place the dough into the bowl (the dough will be sticky), cover with a damp towel, and place on the stove top for 1 hour.

After 1 hour your dough will have doubled in size and is ready for the next step.

While I was at the cooking class I learned about this cute little baking gadget, a wicker bread proofing basket.
Basically it is a fancy bread mold. You don't HAVE to use this.
If you don't have one, a mixing bowl with parchment paper or a clean dish towel with flour in it will work great.
BUT, if you DO have one, give it a dusting of flour.

Next place the dough onto a floured surface and knead it to form a ball.
Then, place the dough in the basket, cover, and set on the stove top to do another hour rise.
This time though, while the dough is rising, you will need to bump the oven temperature up to 500 degrees and place a dutch oven in it to heat as well.

After 1 hour, your dough will look a little something like this.

Now you are going to turn the dough out onto a piece of parchment paper.
Do you see how the proofing basket gave the bread a neat texture? Yeah, that is it's soul purpose. So don't run out and purchase one of these unless you REALLY want to.
I will tell you that if you have used a mixing bowl for your proofing, just give the dough a little dusting of flour. It will make a prettier finished product. :)

The next thing you will need to do is take a paring knife and make some slits in the top of the dough.
This is to keep the dough from exploding in the oven. That would not be pretty.
You can do any pattern you like. I just chose to do an "X".

Now you will remove the HOT dutch oven from the oven and place the parchment paper with the dough on it, into the pot.

Place the HOT lid back on the dutch oven.

Then place the HOT dutch oven back into the oven.
Bake for 20 minutes.

After 20 minutes, remove the lid from the dutch oven and allow it to cook for another 10 minutes to brown.
Now, you are going to smell something burning. DON'T WORRY! It is just the parchment paper.
It is 500 degrees in there for Pete's sake! *lol* You're bread is fine,

After 30 minutes remove the bread from the oven.
Eeeeeek! Look at it!

Then, CAREFULLY remove the bread from the dutch oven and place on a cooling rack.

And there is it. Look at it! Look at what you did! It is stunning! Let's be honest. If you bring this beauty to the table, your family may possibly give you a standing ovation. I'm serious! It is THAT pretty. And not only is it pretty, but it is perfectly crisp outside and light and chewy inside. You are going to love it! I dip mine in a little balsamic vinegar and extra virgin olive oil, but some good ol' fashioned butter on this is DIVINE! Oh, and this would be PERFECT for you leftover turkey sandwiches this Thanksgiving. OH YEAH!
So don't let the term ARTISAN scare you. Give this incredibly simply recipe a try! You may never buy your artisan bread again!
Happy Reading, Happy Eating, and Happy Living,
~The Kitchen Wife~


I made this yesterday and it was amazing. I did have one problem. The bottom was burned. Nothing major, just a thin layer of black that was hard. I heard a sizzle when I put the bread into the dutch oven so I assume that the burning was because it was in direct contact with the preheated surface. Any suggestions?
ReplyDeleteOh, that's pretty interesting! I've been looking for a good bread recipe for a long time because it's actually hard to find anything decent. But can you tell me the calorie count there? I'm a huge fan of bakery products, and I always check the calories in such products because I don't want to eat a lot and gain weight, but at the same time, I don't want to limit myself too much.
ReplyDelete