

It's almost the weekend and, if you're like me, you are starting to run out of steam. You're not quite ready to order take-out, but you're not going to be making anything fancy...or are you? It is on nights like this that I like to take a few simple ingredients and jazz them up a bit to make something special! Take these Marinated Grilled Chicken Sandwiches with Roasted Red Peppers and Goat Cheese. It sounds fancy, but this couldn't be more simple for a busy, late-in-the-week, meal. Let me show you how I make it!
Marinated Grilled Chicken Sandwich w/ Roasted Red Pepper & Goat Cheese:
*Prep Time: 30 min. *Cook Time: 15 min. *Difficulty: Easy *Servings: 2 Sandwiches
Ingredients:

- 2 Boneless Skinless Chicken Breasts
- 1 Red Bell Pepper
- 1 Loaf of French Bread
- Spring Greens
- Goats Cheese
- 2-3 tbsp. Extra Virgin Olive Oil
- 1 tsp. Lemon Pepper Seasoning
- 1 tsp. Salt
- 1 tsp. Lemon Juice

This first step is entirely up to you.
But I encourage you to try it at least once because come one, it is FUN to try new things in the kitchen right!?!
Place your red pepper over your burner and turn it on high heat, allowing the skin to char, turning it periodically.
If you have an electric stove you can put it in the oven under the broiler, but be sure to keep and eye on it while turning it as well.
Of course you can used jarred, but like I said, it is fun to learn new things in the kitchen.

While the pepper is roasting, you can begin to prep your chicken.
Place the boneless, skinless breasts in a plastic Ziploc bag.
Add the lemon pepper seasoning,

Salt,

Extra Virgin Olive Oil,

And lemon juice.

Seal the plastic bag, and gently massage the chicken, making sure the breasts are fully coated, and then place in the refrigerator for 30 minutes.

Around this time your pepper should be finished charring.
Remove it from the burner or oven and place in a bowl.
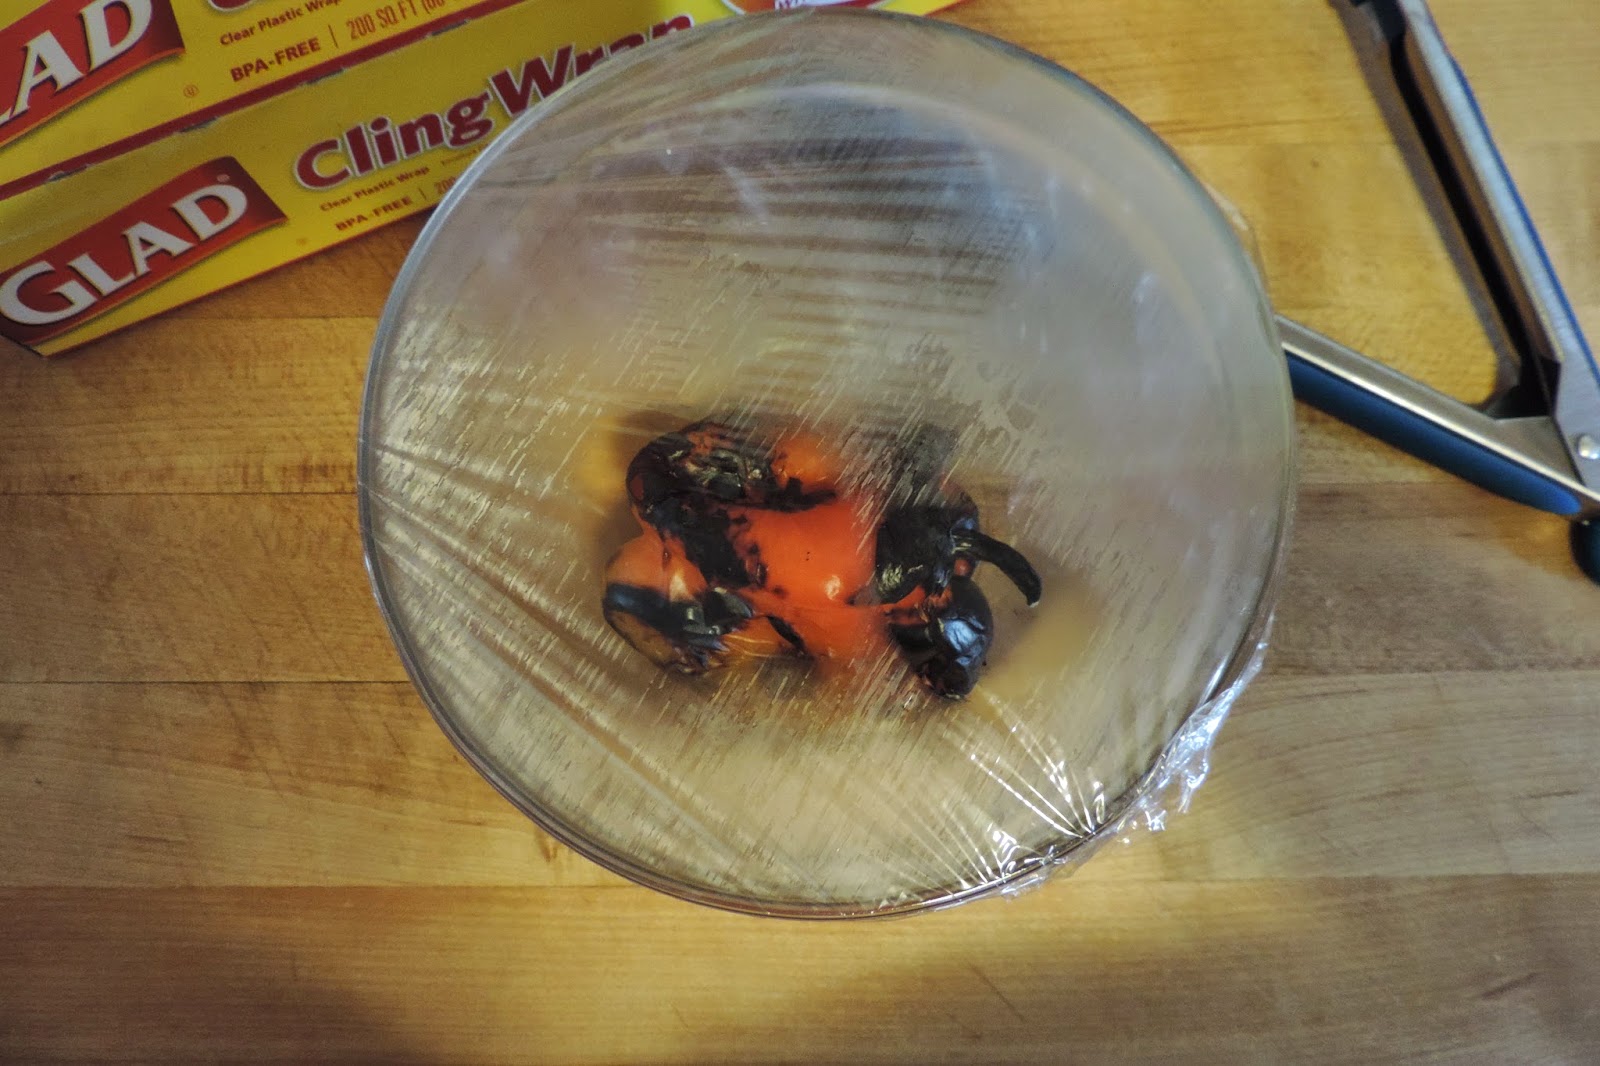
Cover the bowl with cling wrap and wait 15 minutes.

After 15 minutes, remove the cling wrap and gently peel the charred skin from the pepper. Then remove the stem and seeds. Look at that! You have just successfully made your first roasted red pepper!!! WAY TO GO!!

Slice the pepper into wide strips and set to the side for later.

By this time your chicken will be ready to start grilling.
Of course you can use and outdoor grill, but it was raining so I brought out my grill pan.
Get the pan nice and hot, I mean SMOKING HOT!
Then, at an angle, place the chicken on the grill pan & cook for 4 minutes.

If you want those cool criss-cross marks on your chicken at this point, turn the chicken to the opposite angle. And allow to cook for 4 more minutes.
If not, just allow to cook the 8 minutes.
If your pan is too hot, just adjust the heat.

After about 6-8 minutes, you will notice that the breasts are white half way up the side.
That means it is time to flip!
If you did the neat criss-cross trick this is what it will look like!
Let the chicken cook for another 6-8 minutes until the breast is cooked all the way through and the juices run clear.
I will tell you that, when using an indoor grill pan, I like to make a little incision in the thicker section of the breast to make sure it is cooked all the way through.
Remove from the grill pan and set to the side to rest.

Now it is time for the bread!
Get yourself a nice loaf of french bread and slice it into thin slices.

Then, spread a little butter on those slices.

Next, place them, butter side down on your hot grill pan.
Add some goat cheese and your grilled chicken breast.

Now for the fabulous roasted red pepper your did YOURSELF! WOOT WOOT :)

Then the spring greens and the top half of the bread, butter side up!

This is where I am going to get a little West Virginia on you. *lol*
I do not have a fancy pannini maker, so I just grab my iron skillet and WHAM! Instant Pannini maker!
After 2 minutes, flip and WHAM again.
Cook two more minutes and...

Her you go! A delicious, flavorful, grilled chicken sandwich that was so simple to make, but so decadent that no one will know it didn't take hours! This is a perfect late-in-the-week meal so give it a try tonight!
As always,
Happy Reading, Happy Eating, and Happy Living,
~The Kitchen Wife~
Marinated Grilled Chicken Sandwich w/ Roasted Red Pepper & Goat Cheese:
*Prep Time: 30 min. *Cook Time: 15 min. *Difficulty: Easy *Servings: 2 Sandwiches
PRINTABLE RECIPE
Ingredients:
- 2 Boneless Skinless Chicken Breasts
- 1 Red Bell Pepper
- 1 Loaf of French Bread
- Spring Greens
- Goats Cheese
- 2-3 tbsp. Extra Virgin Olive Oil
- 1 tsp. Lemon Pepper Seasoning
- 1 tsp. Salt
- 1 tsp. Lemon Juice
Directions:
- Place a red pepper on your burner and turn on to high, allow the skin to char while turning periodically.*
- Place the chicken breasts in a Ziploc bag.
- To the bag add the lemon pepper seasoning, salt, lemon juice, and extra virgin olive oil.
- Close the bag and gently massage the chicken to make sure it is fully coated.
- Place in the refrigerator to marinate for 15-30 minutes.
- Remove the charred pepper from the burner and place in a bowl. Cover the bowl with cling wrap and let it set for 15 minutes.
- After 15 minutes remove the cling wrap. Then, gently remove the charred skin from the pepper and the seeds.
- Slice the pepper into wide strips.
- Pre heat a grill pan or outdoor grill.
- Remove chicken from the Ziploc bag and place on the grill.
- Cook for 6-8 minutes.
- Flip and cook for 6-8 minutes more.
- Slice the French Loaf of bread into thin slices.
- Spread butter on one side of each slice.
- Place the bottom slice of bread on the grill pan butter side down.
- Spread goat cheese on the bread.
- Add the chicken.
- Add the red pepper.
- Add the spring greens.
- Add the top slice of bread butter side up.
- Take a heavy skillet and place on top of the sandwich.
- Cook for 2 minutes.
- Flip the sandwich, place skillet on again for 2 more minutes.
- SERVE AND ENJOY!
*If using an electric stove top, place in oven under the broiler.


0 comments:
Post a Comment